The Process
A log of communication with the team and partner.
Date: 17 Jan 2018
Abhay, Allen, and I were placed in the group responsible for building the Little Free Library. After quick introductions and building a set of interview questions, we split roles: Abhay and Allen would ask the questions and I would take notes.
While identifying the critical customers, Abhay questioned if the students were the actual critical customers considering there was already a school library present. Our assumption implied that students would not need and pay attention to the Little Free Library installation. Upon interviewing Jenny, we were informed that there was no library on campus. There were a lot of books in the possession of teachers who didn't know what to do with them. However, these were not leveled for the 585 students. Thus, having a Little Free Library would make it easier to put these books to good use. The only request was that when someone takes a book, he/she/they leave one in return. Quoting Jenny, "the primary users would be the community of the school but theoretically speaking, anybody could use [the Little Free Library]. The library would still be here open during the summer so it's also for the greater community." Therefore, the critical customers would be not only the students but also their families and the general local community.
Once the customers were identified, we thought it was a good idea to inquire about functionality. Jenny responded with: "About 5-6 shelves which could store stay 200 books but could be accessed by kids of all heights. The minimum height [dependent on the shortest student] would be around 2-3 feet and the maximum height would be around my height: 5 feet."
To get a visual, we were guided to the dirt and woodchip area upon which the library was to be built. The choice for this location was based upon easy access to both the local community and school community. This was because, as Jenny pointed out, this was the area through which files of students would pass during entry, exit, and recesses. Remembering Jenny's concern over having difficulty staking through the ground, we inquired about the source of that concern. She brought up that excavators were once needed to plant trees in the same area, hinting that the area was hard to simply dig into. Gauging for environmental stressors, we asked Jenny about the weather conditions of the area. There was a fence with a cloth mounted on it in front of which the library was desired. Jenny highlighted that the wind circulates around the fence, implying that the installation would need protective measures from rain and wind. After that, we visited the garden which Jenny manages and were guided to a stack of 5 12-feet long wood planks. We were dubious of its strength but it was nice to have seen a part of the interesting Enrichment program.
Overall, this interview was more of an informative session. We received clarifications. We glanced at the surroundings. We looked for clues to understand the explicit and implicit needs of Mosaic Elementary. We ended the visit with a debrief and decided to discuss potential design ideas next time based on all the information collated today.
Week 1&2: Team Assignment and Meeting with the Client


Image 2: Stack of 5 12-feet long wood planks in ROMO's garden.
Image 1: The dirt and woodchip area where the library would be placed.

Image 3: The trees which were planted using excavators in Image 1.
Week 3: Design Ideas & Progress Analysis
Date: 24 Jan 2018
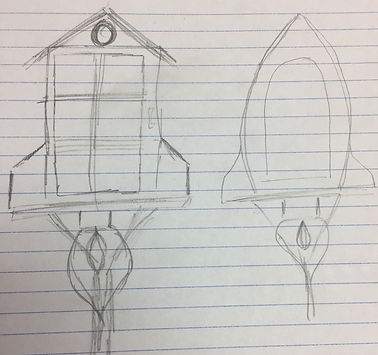
Image 4: Initial Design Idea
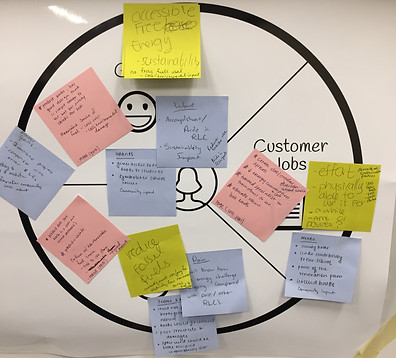
Image 5: Project Value Chart
Abhay, Allen, and I drafted initial designs for the Little Free Library. Based on Jenny's estimates, I tried to construct a design which could incorporate as many books as possible for a 2-5 feet library. We wanted the theme to reflect the school's logo: a rocket ship. When discussing our individual design ideas, we outlined the drawbacks of each design. For instance: a hexagonal based shelf would be hard to install and retrieve books from, a horizontal orientation would better suit our critical customers than a vertical one, and a three-legged base would be hard to position into the dirt-woodchip area. Borrowing from the strengths of each other's designs, we decided to re-design such that the library would meet Jenny's expectations and be feasible to build.
In addition to discussing our individual designs, we were able to create a Gantt Chart representing all the materials we would need and the tasks we would need to accomplish to build the final design. A system like that would help track our progress in a quantitative fashion which would allow us to hold each other accountable. We worked on a Project Value Chart which aided in mapping out our project's goal, possible mishaps, and integral requirements. Based on this information, we tried constructing and delegating tasks and sub-tasks evenly and populated our Gantt Chart with it.
Week 4: Maker Lab training & Discussion with Client
Date: 31 Jan 2018
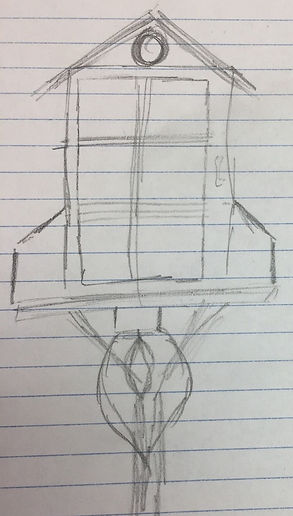
Image 6: Design #3

Image 7: Design #1
This week Abhay and I received training at the Maker Lab for basic equipment. While the power tools would help us with the parts constituting the library, we realized that we could use the laser cutter for the details of our design. Abhay and I discussed that the laser cutter would prove useful for engraving ROMO's name and other visual details. Post training, Abhay, Allen, and I debriefed and decided to present our designs to Jenny for feedback.
We set up a video conference call with Jenny for input. Jenny really liked Abhay's design (Image 7), but voiced our fear about time constraints -- it would be difficult to build such a design in 6 weeks. She liked the traditional design of Design #3 (Image 6) and since it was similar to previous library builts, she approved of this design as it met ROMO's requirements and could be modified to meet the school's vision of a colorful, visually appealing library. Since she loved the "Mosaic Elementary" sign on Design #1, and the base and built of Design #1, Abhay proposed to re-design the library incorporating the strengths of both the initial design proposals. Allen would begin research on material such as wood and I would look at comparative free little library models. Based on our research, we decided to draw up a cost-analysis for next week.
Week 5: Design Finalization &
Week 6: Material Research
Date: 7-14 Feb 2018

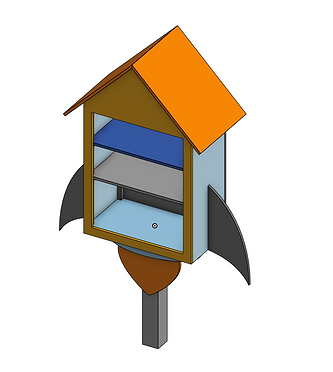
Image 8: Initial Designs


Image 9: Final Design
During Week 5, Abhay and Allen met and charted out the specific measurements of the final design's components. Allen created a rough 3D sketch (Image 8). Abhay incorporated the colors which would match ROMO's theme in the modified design.
During Week 6, Abhay, Allen, and I revisited the measurements and realized we had over-estimated. We decided to decrease the measurements. We didn't want to compromise on the library's capacity so reduced our design from 3 shelves to 2 shelves. We also realized glass would be too heavy so, Dr. JAK suggested we use acrylic. We then visited TAP plastics to get a look at the best materials to construct the see-through door. We were introduced to Polycarbonate (1/4" & 1/8"), HPDE Starboard, and TW-CCR. We also got a sample for the Starboard. While the materials looked promising, we wanted to find a more cost-effective solution so, I decided to look at comparative models and view the materials they employed.
Later that week, Allen and I met to finalize the CAD design after researching other little free libraries. We realized most libraries use screws instead of screws, find a single door to be stronger and more water-resistant than a double door, cover the apex of the roof with a sheet of metal, and have self-closing hinges. We also believed a long handle would be suitable for customers of all heights and a magnet mechanism would be a great addition to the door frame. While there were libraries that had a door frame placed within the body of the library, we decided having the door frame mounted on top would be more visually-appealing and inviting. Such a door frame would be best complemented by an interior, self-closing hinge. We then incorporated these changes to the CAD design (Image 9).
For our agenda next week, we concluded that parts need to be ordered after discussing ways to reduce costs. Reduction of costs could either be done by using the wood we found in ROMO's garden (Image 2) to build the fins of the library or by collaborating with SCU's Civil and Mechanical Engineering departments for equipment and paints. We would begin building next week.
Week 7: Status Update & Material Search
Date: 21 Feb 2018


Image 10: Trying to find a match for ROMO's theme colors at Kelly-Moore Paints
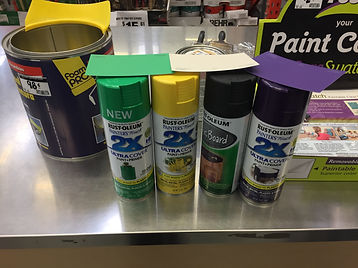

Image 11: Finding cheaper alternatives to paints at Home Depot
This week, we gave our partner a status update. We walked our partner through our design process: the initial sketches, the CAD design, and the final design. We explained new additions such as employing a cylindrical base to reduce cement volume, planting a door frame instead of embedding one to make the Little Free Library more appealing and splitting of the top shelf to access the books in the back. We highlighted research, gave an overview of the tasks completed, and delineated the work yet to be completed. Most importantly, we presented the most impending obstacle: being over budget. Allen and I researched the best options available for the materials we needed and conducted a cost-analysis only to realize we would need $343 but our budget is $100. The greatest cost-consuming materials were the 3 gallons of paint and 2 sheets of 4x8" plywood.
We debriefed with Dr. JAK and she suggested cutting on paint costs by using spray paints and inquiring Kendal about spare plywood. Later that week, Allen and I decided to visit Kelly-Moore Paints to pick sample on the colors we needed. We found the colors that matched the color scheme we wanted and ROMO followed. However, the manager at Kelly-Moore Paints told us that he didn't have gallons of the colors we were looking for and that these paints were not meant for exterior use. The price for a quartet was around $40 as well. He suggested we visit Home Depot. At Home Depot, the prices for quartet paints were reasonable, but we would either need a primer or 2-3 coats of the paint. We inquired about spray paints and were told that spray paints would last as long as the paints. Since the spray paints were much cheaper and would get the job done, Allen and I decided to buy them. The spray paints had primer in them and the total of 3 cans was $14.79 which was way less than the money that would be needed for 3 gallons of paints ($120). We also bought $1 sample spray cans to practice with.
Allen suggested asking for sponsorships to bring down our costs for plywood. We contacted HD Supplies and were to hear from them the following week. For the next meeting, our agenda would then be to gather all materials needed to build the Little Free Library and visit the Maker Lab to begin building the individual parts.
Week 8: Material Accumulation & Building
Date: 28 Feb 2018

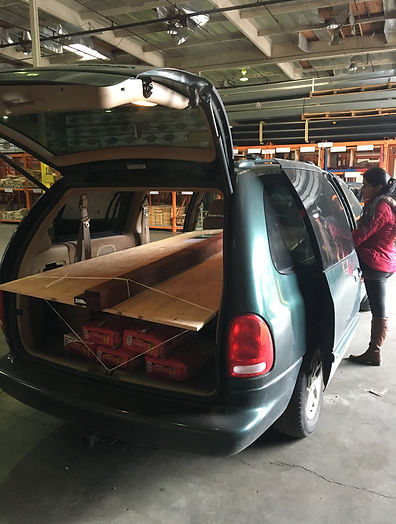
Image 12: Picking up materials from HD Supply
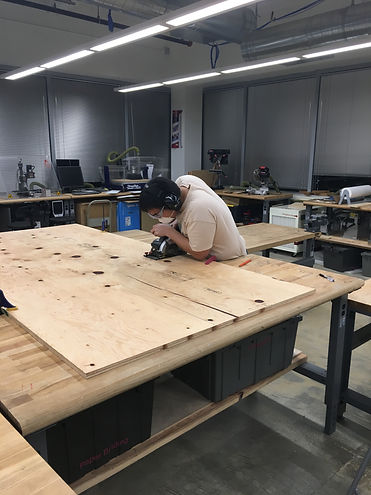
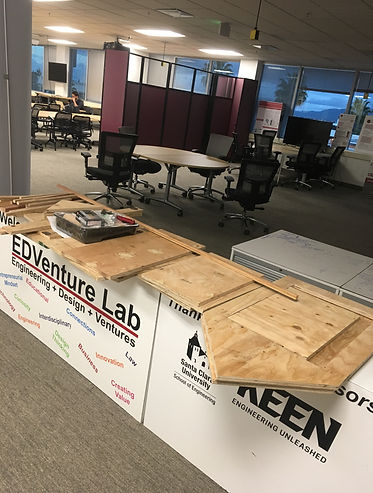
Image 13: Parts created with the help of power tools
On Wednesday, HD Supplies got back to us. They approved the grant we requested. So, we headed to HD Supply's lumberyard to pick up the materials we needed to start building the Little Free Library's parts: the 4x8" plywood sheet, 1" sticks, concrete, screws, hinges, wood glue, wood putty, acrylic sheet, and paint (Image 12). We then headed to the Maker Lab and managed to cut the 4x8" plywood sheet in half before open hours ended. Abhay and Allen stored the wooden parts in the trunks of their vehicles and I stored the paints and glues.
Later that week, we returned to the Maker Lab to work. We reviewed the specifics of every part outlined by our CAD design and then marked the plywood sheet with those measurements. With the help of power tools, we were able to cut out the front and back of the library body, the shelves, the half-shelf, the posts, and the bases for the shelves (Image 13). We decided to use the wood that remained for exterior design. For instance, most of the scrap wood would be used to create the "fins" which would give our Little Free Library the look of a rocket ship. While Abhay and Allen cut the parts, I sanded them to ensure we wouldn't cut ourselves while transporting the pieces and to give the pieces a finishing touch.
Our agenda for next week is to figure an area to store our library because while we can currently transport the individual pieces back and forth, once we integrate the parts for the build, transportation is not a viable option. In terms of building, we need to accomplish drilling holes to insert screws, cut corners of shelves to allow for posts, paint, and integrate all the parts.
Week 9 & 10 : Post Installation, Prototyping & Integrating Build
Date: 7 March 2018

Image 14: Using the CAD design for prototyping and comparing measurements in theory and assembly

Image 15: Realising base of the Little Free Library would be a problem because the team overestimated

Image 16: Re-assembling to resolve issues arising from overestimating and then re-measuring all parts
Till Wednesday, we worked on measuring and cutting the parts of the Little Free Library. Measuring dowel lengths and marking up dowel placeholders on Wednesday took about 3 hours. Since I had some free time on Friday and measurements took a long time on Wednesday, I headed to the Maker Lab to estimate if any other parts needed to be created or marked up.
Upon prototyping the build by placing the parts in their respective placeholders, I realized we over-estimated and that the base and middle shelves were bigger than the dowels upon which they would be placed (Image 14 and 15). I re-measured the placeholders for most parts and waited until Saturday to discuss with the team on how to best move forward with the build (Image 16).

Image 17: Using an auger to dig a 3 feet hole to install the post
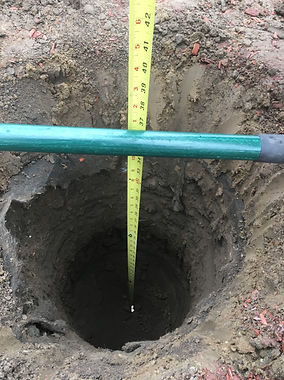
Image 18 The 3 feet hole to plant the post
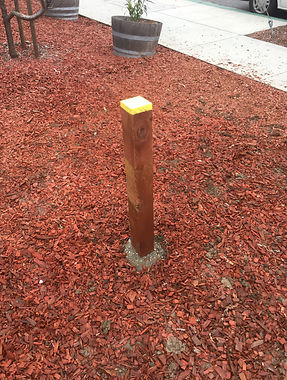
Image 19: The installed post
On Saturday, Allen, Abhay, and I visited ROMO to dig the hole, plant the post upon which the Little Free Library would be mounted, and fill the hole with cement and gravel. The entire process took about 5 hours. Initially, getting the auger working was an impending obstacle. After several failed attempts, trying to work with shovels instead, and FaceTiming the HD Supplies representative, we got the auger to start when the representative visited ROMO and resolved issues with the auger on-site. We finished digging the hole and planted the post. Allen and I had spray painted the end that would be exposed to air and moisture in order to seal that area (Image 19). We also ensured we didn't allow the dirt anywhere near the cement mound and wooden post, for it would cause the wood to rot.
We then headed to the Maker Lab and discussed ways to resolve the issues with over-estimation. We decided to cut the shelves to the exact length of the dowels upon which the shelves were to be placed and leave the supporting walls the same length. The idea was to let the over-estimated part of the wall remain and place the shelf a little above. This would not be a problem since the walls were exterior parts and could afford being exposed to air and moisture. This would allow us to save time and focus on integrating the build instead.
On Monday and Tuesday, we were able to re-measure and cut the shelves, mark the spots where we would drill into on all the dowels (Image 20), and used power tools to drill and insert screws to integrate the build. The build no longer needed clamps to be held together, the screws now held the inner parts of the build together (Image 21). Now, we had to finish planting the hinges, attaching the door, placing the acrylic within the door frame, mounting the door frame, attaching the roof, painting all the parts, and attaching the fins. Installing and testing our complete solution remains as well.
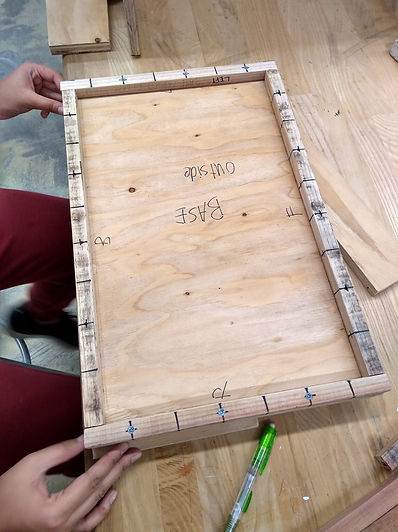
Image 20: Marking the spots on the wooden dowels where we drill into and insert the screws

Image 21: Integrated inner parts